How to Draw on an Image in Google Docs
- Home
- IT Resources

Google Docs is an online tool that allows you to format documents for free, as long as you have a Google account. It has several included features, including the ability to draw on your files and the images in them.
Many artists love to use this tool to create a unique design for their next project. Some teachers need to draw in Google Docs too, however, to edit and mark students' work.
There are several methods you can use to learn how to draw on an image in Google Docs. Continue reading below to learn more about each of the options.
Upload an Image into Google Docs
Before you learn how to draw on an image in Google Docs, you must understand how to upload one. There are two separate methods, each dependent on if you are on a desktop or mobile device .
On Desktop
- On a browser, go to docs.google.com and log in.
- Open a new document.
- Press "Insert."
- Click "Image" and choose the location where you can find the graphic.
- Press "Open."
On a Mobile Device
- Download Google Docs from the Apple App Store or Google Play store.
- Open the app and log in.
- Press the plus sign, which means "Insert."
- Tap "Image."
- Choose the location of your image and select the appropriate photo.
Drawing on an Image in Google Docs
There are several methods you can use to learn how to draw on an image in Google Docs. Each is in detail below. Understand, however, that most of these methods will work for freestyle creations too.
Use the Drawing Tool on a Desktop
The drawing tool is not yet available on the Google Docs mobile app. For this reason, you have to be on a desktop computer to use this method. Learn more about the steps required in the information below.
1. Go to www.drive.google.com and locate the file where you want to draw.
2. If you want to create a new document, go to www.docs.google.com and press "New."
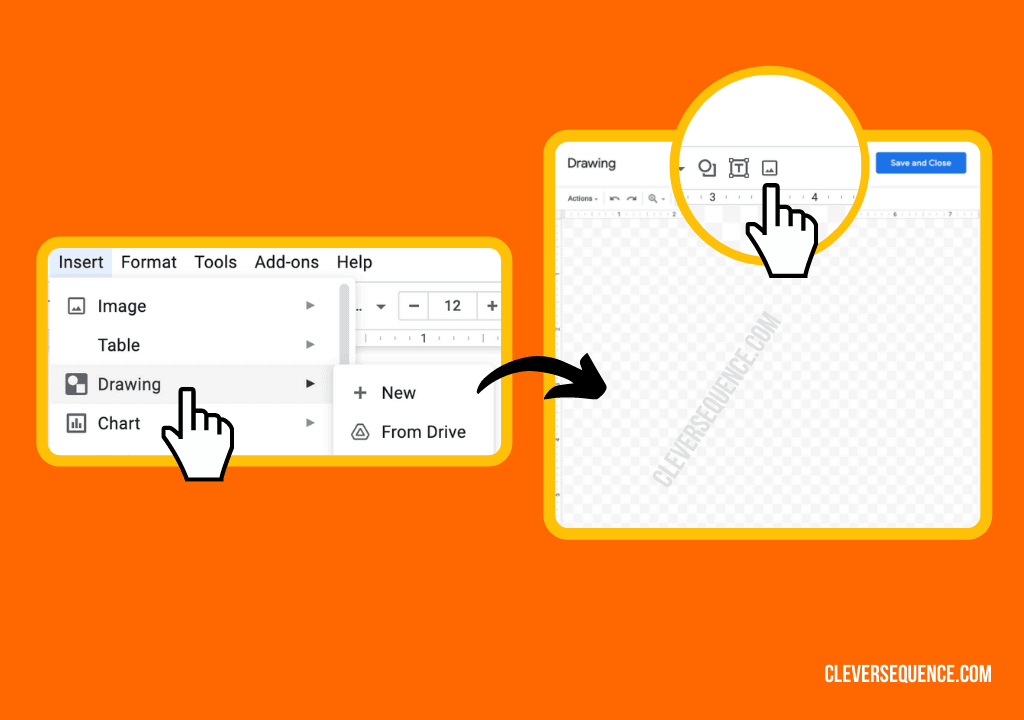
3. Look for the toolbar at the top of the page, and press "Insert."
4. Hover over the "Drawing" option with your mouse.
5. Click on "New." and pick your Image
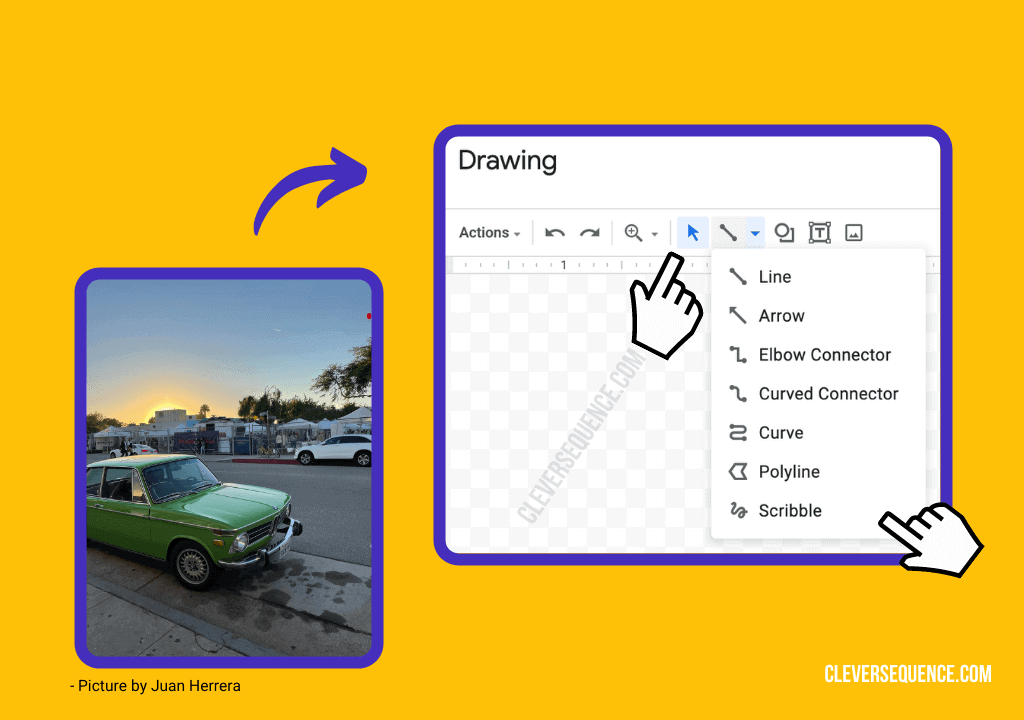
6. Click on "Line" and wait for the pop-up window to show up. This space will be where you draw.
7. Select the appropriate tool for your drawing in the toolbar. Click and drag your mouse until you create your image.
8. After you are done, press "Save and Close."

The toolbar in the drawing pop-up window will also let you create shapes and lines. You can also add text to your drawing to give it a more personalized look.
Add a Drawing from Google Drive
On a desktop, you can also create a drawing in Google Drive and add it to your Google Docs file. Learn more about each of the two required processes below.
Create a Drawing in Google Drive Using Google Drawings

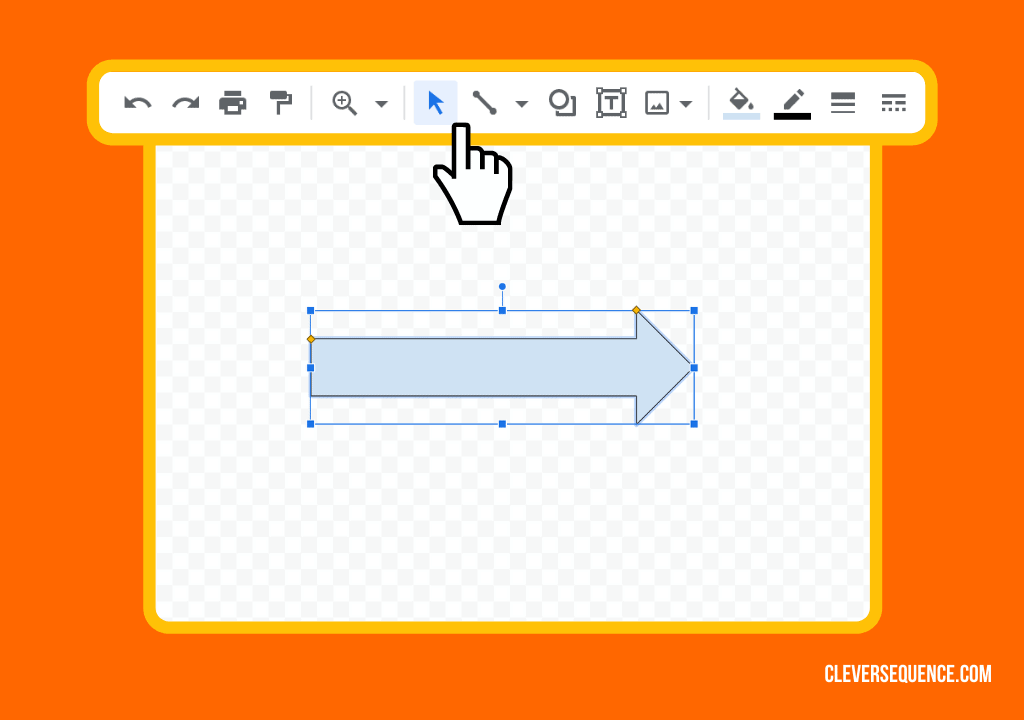
4. Use the tools provided to create your drawing.
5. Save your new image by closing out of Google Drawings.
Insert the Google Drive Drawing
After you craft a drawing using Google Drive, you can insert it into any Google Docs file. Follow the steps below to learn more!
1. Go to www.docs.google.com and sign in to your account.
2. Open a Google Docs file by double-clicking on it or pressing "New."
3. Click on "Insert."

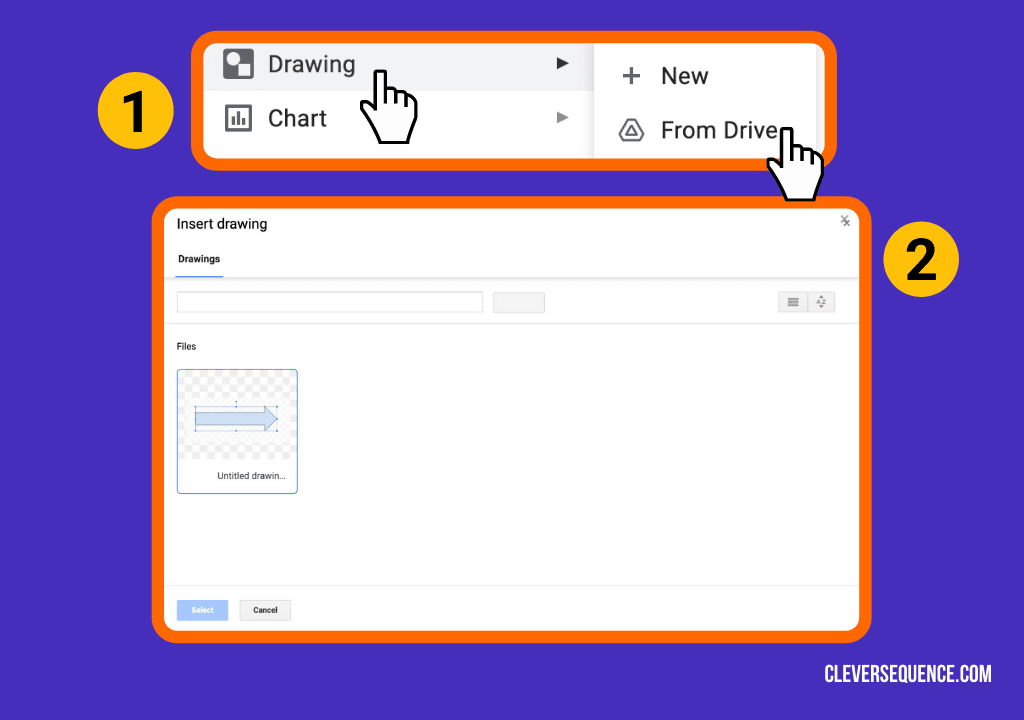
4. Hover over the "Drawing" option, then press "From Drive."
5. Find the drawing you want to add and press "Select."
After inserting the drawing into a Google Docs file, it will always link to the Google Drive creation. You can unlink it by pressing "Unlink" in the top right corner after clicking on it. To update the drawing, select it, then in the top right, press "Update."
Draw with an iPad
As mentioned, the Google Docs app does not let you create a drawing. This fact is possible when using an iPad, in most circumstances.
If you want to learn how to draw on Google Docs iPad, you should export the document first. It is also much easier with an Apple Pencil.
Export a Google Docs File
As mentioned, to learn how to draw on Google Docs iPad, you first need to export the Google Docs file. You can save it to your files or the cloud using the steps below.
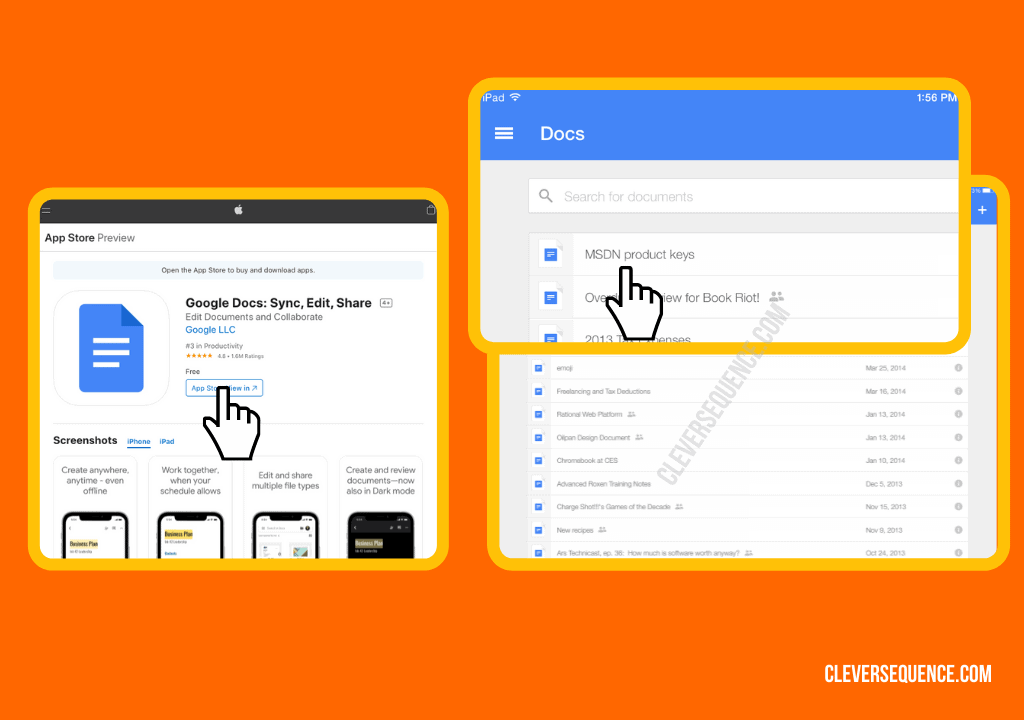
1. Download Google Docs from the Apple App Store.
2. Open the app and log in to your account.
3. Tap on the document that you want for drawing.
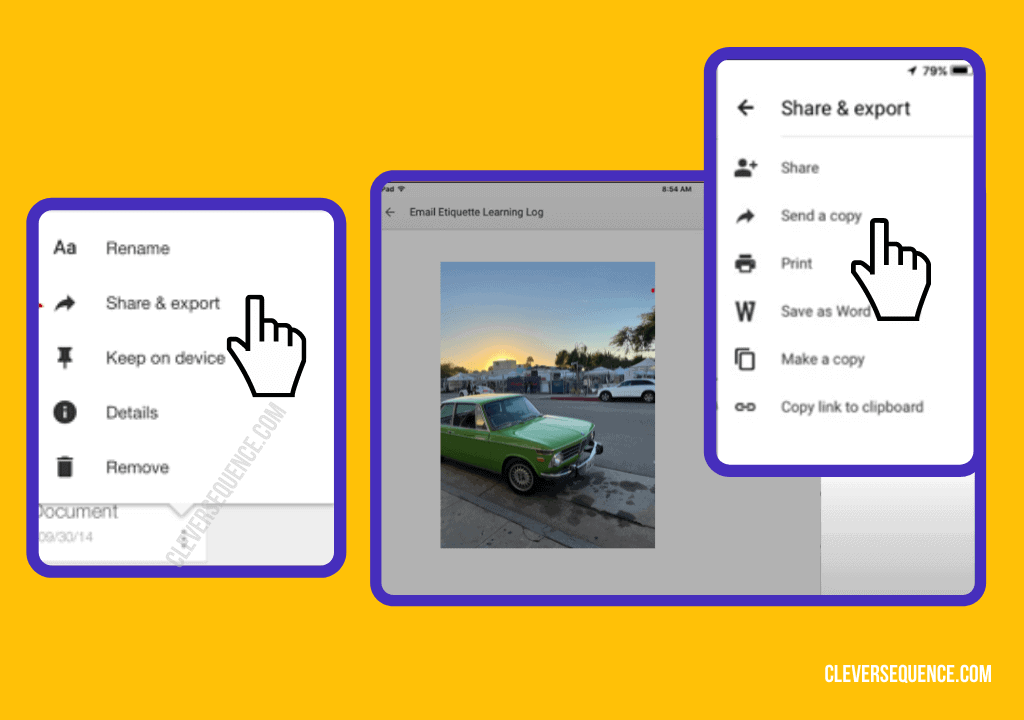
4. Look for the three dots on the top right corner and press them.
5. Select "Share & Export."
6. Press "Send a Copy."
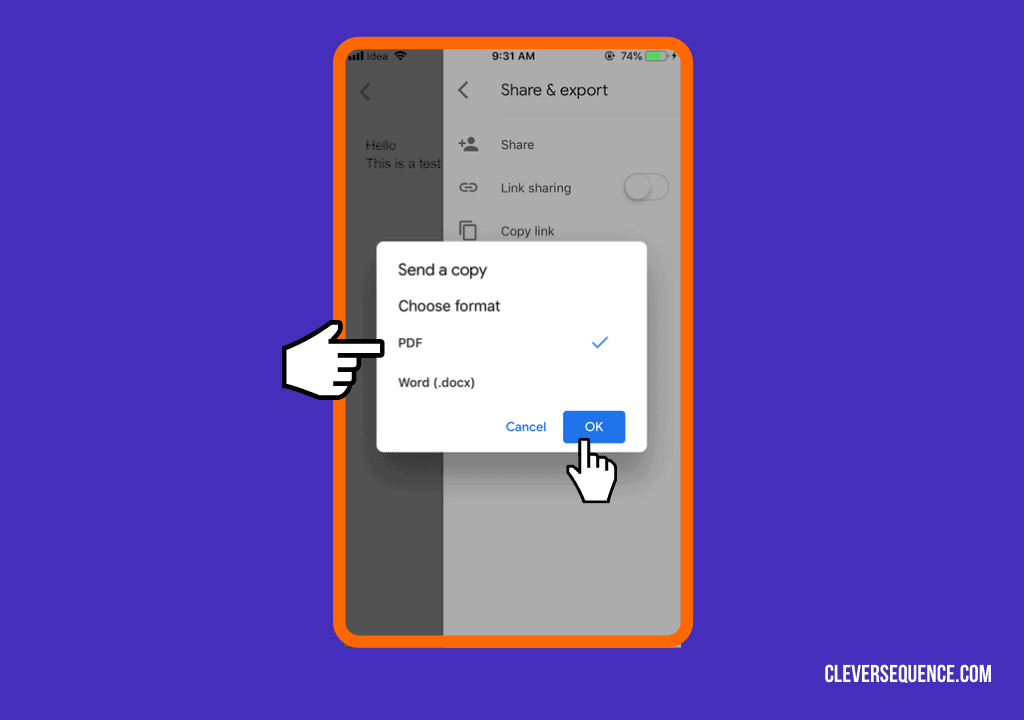
7. Choose a PDF or Word document format.
8. Press "Ok."
9. Add the document to your iCloud drive, your email, or to your notes if desired.
Draw on the File
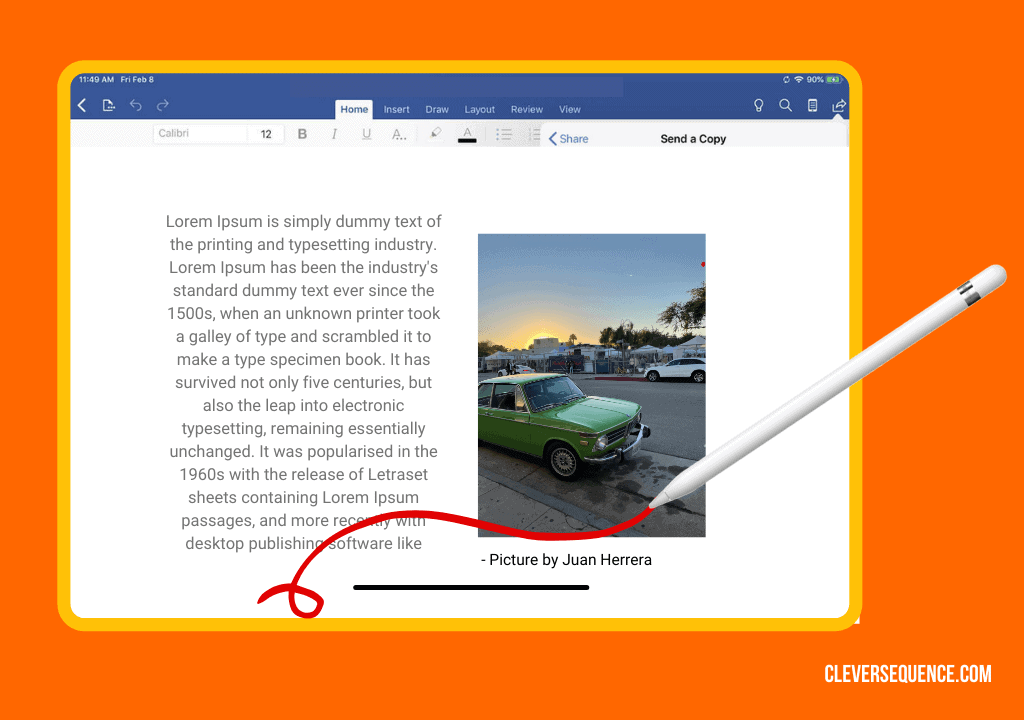
When you open your file, you can tap on it with your Apple Pencil to start drawing. Many tools will help you create the look you want, and you only have to press "Done" when finished. These include resizing, stroke sizing, re-coloring, and erasing.
Types of Drawings in Google Docs
There is a variety of drawing types you can learn to add in Google Docs. All of these are available when in the pop-up window aforementioned. Some of the most popular are in the information below.
Line
The line option lets you draw straight segments. Click and drag between two points you create on the page. An Arrow is similar to a line in that it is a straight segment. The difference is, however, that you only have to select one point and the direction.
Curve
If you want to make custom curves, this option is best for you. You will start as if you wanted to create a line. You will tap the screen again at the place you want the curve to begin. To better shape the curve, you need to understand how to move a drawing in Google Docs by dragging it.
Polyline
The polyline option allows you to draw custom shapes and is very similar to the curves tool aforementioned. It will create right angles instead of curvatures, however.
Shapes
The Google Docs drawing tool also has pre-made shapes you can use. After selecting the appropriate option for your document, click and drag to change the size.
Scribble
If you want to free draw, scribble is the option for you. After selecting this tool, hold down the left side of your mouse and start drawing!
Editing Drawings in Google Docs
When learning how to draw on an image in Google Docs, there are several editing features available. Read below to learn more.
Move a Drawing
It is easy to learn how to move a drawing in Google Docs. Click on the image to select it, then drag it to its new placement. You can also use the small squares called anchor points around the perimeter of the drawing to resize it.
Crop and Rotate the Drawing
If you need to change the orientation of the drawing, you can use the crop and rotate tools. Click on the created image, and click on the blue dot on the extended line above it to change its orientation. If you want to cut out parts of the drawing, you will click on the crop tool in the toolbar, removing the parts you do not need.
Add a Border to Your Drawing
Adding a border is a fun way to make your drawing more unique. There are three options next to the crop tool. After adding this feature, you can adjust its color, style, and width.
Add Text
You can add words to any drawing you create using the text box tool. Click and drag to create the size you need. After you type your message, make adjustments using the formatting tools for font, color, and style.
Draw on Google Docs
When you learn how to draw on an image in Google Docs or on a blank document, you have the opportunity to broaden your creativity. You can edit any drawing you make by changing its color, adding text to it, and more.
Use an Apple Pencil with your iPad after exporting your Google Docs file to your tablet. On a browser, you can also use the drawing toolbar or Google Drawings. The possibilities are endless!
The above article may contain affiliate links, which help support Clever Sequence
Source: https://cleversequence.com/how-to-draw-on-an-image-in-google-docs/
0 Response to "How to Draw on an Image in Google Docs"
Post a Comment